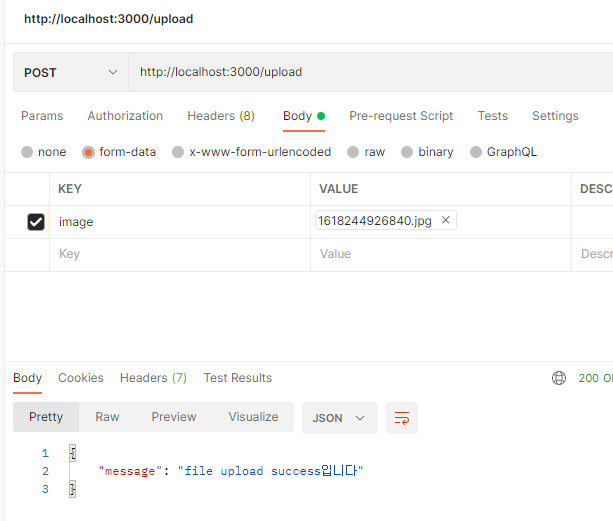
multer를 이용해 파일을 서버로 요청해서 저장할 수 있다. 우선 아래 명령어를 입력하여, multer를 설치하자.
npm install multer
암호화된 module/imageUpload.js
const multer = require("multer");
const upload = multer( {dest: "uploads/"} );
// 여기서 dest는 destination(목적지)의 줄임말
// 해당 위치에 이미지를 저장하겠다는 뜻

module.exports = upload;
routes/index.js
const upload = require("../module/imageUpload"); // imageUplaod.js 불러오기
router.post('/upload', upload.single('image'), (req, res) => {
  // 여기서 upload.single('image')는 이미지 파일을 image라는 key로 받겠다는 의미
  const file = req.file;
  console.log(file);
  res.status(200).json({
    message: "file upload success입니다",
  });
})
실행하면 아래와 같이 터미널 창에 나온다.
middleware입니다!
{
  fieldname: 'image',
  originalname: 'cha.jpg',
  encoding: '7bit',
  mimetype: 'image/jpeg',
  destination: 'uploads/',
  filename: '9c08930045d5853983d0646986e683bf',
  path: 'uploads\\9c08930045d5853983d0646986e683bf',
  size: 1278088
}
POST /upload 200 50.708 ms - 42
터미널 창에서 보다시피, 이미지가 암호화된 형태로 저장된다.
암호화 해제 module/imageUpload.js
이를 사용할 수 있는 이미지로 바꿔서 저장해주기 위해, module/imageUpload.js를 아래와 같이 변경해준다.
const multer = require("multer");
const storage = multer.diskStorage({
    destination : (req, file, cb) => {
        cb(null, 'public/images') //저장할 위치
    },
    filename: (req, file, cb) => {
        cb(null, file.originalname)
    }
})

const upload = multer( {storage: storage} );

module.exports = upload;
변경 후에 실행하면, 터미널 창에 아래와 같이 나온다.
{
  fieldname: 'image',
  originalname: 'cha.jpg',
  encoding: '7bit',
  mimetype: 'image/jpeg',
  destination: 'public/images',
  filename: 'cha.jpg',
  path: 'public\\images\\cha.jpg',
  size: 1278088
}
이제 파일이 원하는 경로에 잘 저장된 것을 알 수 있다.
'CODE > Back-end' 카테고리의 다른 글
| Prisma와 PlanetScale - [1] ORM (0) | 2022.06.09 |
|---|---|
| HTTP Method를 활용한 요청 및 응답 (0) | 2022.01.01 |
| NPM 패키지 설치와 Express, Nodemon (0) | 2021.12.31 |
| API 서버 만들기 (0) | 2021.12.31 |
| Node.js (0) | 2021.12.27 |


댓글